How to build dynamic webforms using API: A step-by-step guide
Webforms are a versatile and valuable tool for businesses of all sizes. They help generate leads, increase conversions, and improve the customer experience. airSlate has developed Document Automation Hub, a comprehensive suite of APIs for organizations whose needs go beyond just eSignature and are looking to fully automate their document processes within their applications. Document Automation Hub seamlessly combines features like PDF editing, document generation, data collection, eSignature, and web forms to potentially transform the development process and boost productivity for technology teams.
What is airSlate webform builder?
The airSlate’s webform builder allows you to easily create web forms according to your needs. For popular cases, use one of the ready-made templates from the airSlate library to save time. For more specific needs, create unique dynamic webforms by adding your custom fields and parameters. After that, distribute your forms via public links to collect data from your recipients. The entire process occurs right inside the product, and you don’t have to upload documents from servers or cloud storage services.
Here are some examples of workflows you can set up using airSlate’s dynamic web forms:
- Create surveys and application forms
- Collect personal information
- Approve requests
- Sign agreements, purchase orders, and invoices
- Request attachments
- Process payments
- Build quizzes and tests
- Make calculations and much more.
In this blog, we’ll explain how airSlate’s webform API works.
Collecting registrations using airSlate’s dynamic webforms
Let’s look at how airSlate web forms work based on an example. A company is hosting a conference and wants to collect registration information from attendees. Check the diagram below for a bird’s eye view of what the entire workflow looks like.

1. Getting started
Before you start working with airSlate API web forms, you have to pass three basic steps:
- Go to the homepage and log in to the dashboard. There you’ll need to create an integration by following the straightforward process.
- Get your access token to be able to make API calls. The airSlate API supports the following authentication grant types:
- Code Grant
- JWT Grant
- Implicit Grant
- Create an Organization where you will work using the POST/organizations endpoint. Organization is an environment where you and your colleagues generate documents and forms and collaborate on them. In the airSlate user interface, an Organization is equal to a Workspace.
Once in your Organization, let’s proceed with the data collection workflow.
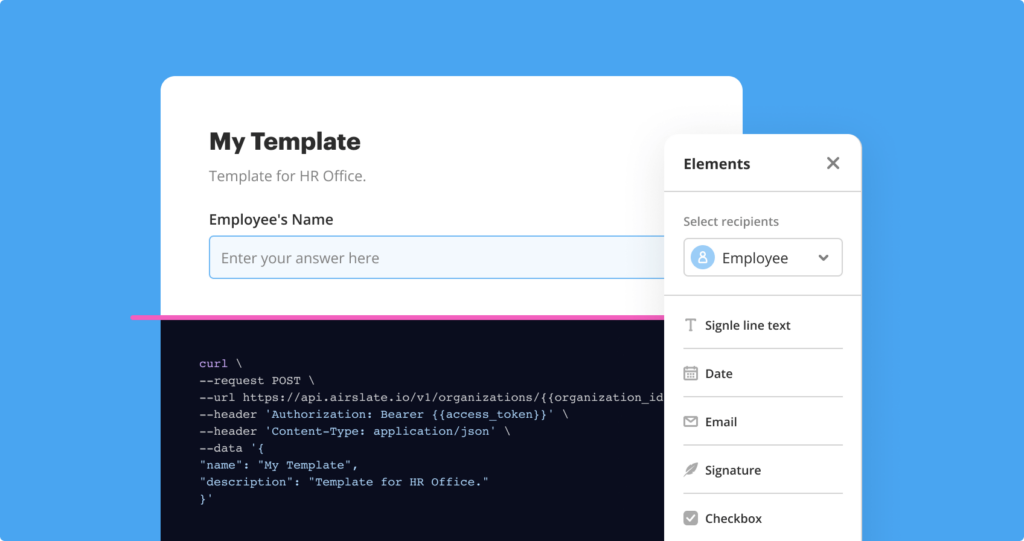
2. Create a Template
Create a Template that will serve as the basis for your forms using the POST /templates endpoint. You’ll be able to add up to 20 forms of your choice to this Template.
Request example:
curl \
--request POST \
--url https://api.airslate.io/v1/organizations/{{organization_id}}/templates \
--header 'Authorization: Bearer {{access_token}}' \
--header 'Content-Type: application/json' \
--data '{
 "name": "Registration Form",
 "description": "Registration form for conference",
 "redirect_url": "https://www.pdffiller.com/?mode=view"
}'
Response example:
{
 "id": "7FD5D6C5-8000-0000-0000BA28",
 "name": "My Template",
 "description": "Template for HR Office.",
 "created_at": "2019-10-10T12:00:00Z",
 "updated_at": "2021-10-10T12:00:00-01",
 "last_activity": "2019-10-10T12:00:00+05:00"
}
3. Create a web form
Select how you want to create your web form according to your needs.
Scenario 1. You want to use a ready-made form template from the airSlate library.
First, you need to get a list of all available form templates by using the GET /templates/{{template_id}}/forms/templates endpoint.
Request example:
curl \
--request GET \
--url https://api.airslate.io/v1/organizations/{{organization_id}}/templates/{{template_id}}/forms/templates \
--header 'Authorization: Bearer {{access_token}} \
--header 'Content-Type: application/json'
Response example:
{
 "data": [
   {
     "id": "7FD5D000-0000-0000-00000029",
     "title": "Registration Form",
     "description": "NEW",
     "preview_file_url": "https://api.airslate.com/v1/download/43A2D9BD-CE40-0000-000045B9?expires=1653865987&signature=b0818ab665421b8b90eb6b9626a68fe7\"",
     "is_active": true,
     "updated_at": "2019-10-10T12:00:00Z"
   }
 ],
 "meta": {
   "total": 10,
   "current_page": 1,
   "per_page": 5,
   "last_page": 2
 }
}
Second, retrieve the form template ID from the response and use it to create a form with the help of the POST /templates/{{template_id}}/forms endpoint.
TIP: To avoid errors, make sure to copy the correct form template ID.
Request example:
curl \
--request POST \
--url https://api.airslate.io/v1/organizations/{{organization_id}}/templates/{{template_id}}/forms \
 --header 'Authorization: Bearer {{access_token}}' \
 --header 'Content-Type: application/json' \
 --data '
{
  "name": "Registration Form",
  "form_template_id": "7FD5D000-0000-0000-00000029"
}'
Response example:
{
 "id": "28400000-0000-0000-000000F6",
 "name": "Registration Form",
 "type": "HTML_FORM_NEW",
 "created_at": "2019-10-10T12:00:00Z",
 "updated_at": "2021-10-11T17:32:28+05:00",
 "fields": [
   {
     "id": "D3D00000-000-0000-000000A6",
     "name": "Input 1",
     "description": "Header description",
     "title": "Header title",
     "type": "heading"
   }
 ]
}
Scenario 2. You want to create a unique form and customize it yourself.
Use the POST /templates/{{template_id}}/forms endpoint as in the first case. The difference is that now you don’t need a form template ID. To create a form with fields, you have to provide an array of fields in the request body. Find a complete list of the fields with JSON examples in the documentation.
Note: If you don’t add fields now, you can do so later (as described in Step 2).
Request example:
curl \
--request POST \
--url https://api.airslate.io/v1/organizations/{{organization_id}}/templates/{{template_id}}/forms \
--header 'Authorization: Bearer {{access_token}}' \
--header 'Content-Type: application/json' \
--data '{
 "name": "Registration Form",
 "fields": [
   {
     "name": "Heading 1",
     "type": "heading",
     "description": "Heading description",
     "title": "Heading title"
   }
 ]
}'
Learn more about what you can do with your web forms in the documentation.
Once your form is ready, send it out for completion.
4. Send out a form
There are two ways to distribute your web form.
Scenario 1. You need to collect information from a public platform.
In this case, create a reusable share link. Every time a new recipient follows the link, a new Flow is generated based on the indicated Template. The link can be used up to 50 times and expires in 30 days. Activate/deactivate it according to your needs using the respective attribute in the request body.
Scenario 2. You need to create custom links for each signer.
When can this be useful? For example, when you’re providing online services and want to collect personal data from your users by embedding links into their accounts. In this case, create a Flow based on a form and share it using one-time links. Keep in mind that as soon as a recipient opens the link, it will no longer be valid.
5. Get notified every time a new form is completed
Subscribe to a Flow completion event to be notified when somebody has completed the form. Use the POST/subscription endpoint and indicate the callback URL to receive notifications.
Request example:
curl \
--request POST \
  --url https://api.airslate.io/v1/subscriptions \
  --header 'Authorization: Bearer {{access_tocken}}' \
  --header 'Content-Type: application/json' \
  --data '{
  "event_name": "NDA.signed",
  "entity_id": "7FD5D6C5-8000-0000-0000BA28",
  "entity_type": "template",
  "callback": {
    "url": "http://apicallbacks.pdffiller.com/handle?hash=a75cb8d8"
  }
}'
Response example:
{
  "id": "5c74677b-86ed-4d8e-8a0c-38d96ef40c5a",
  "event_name": "flow.completed",
  "app_id": "C2D1D654-0100-0000-0000BA11",
  "entity_id": "7FD5D6C5-8000-0000-0000BA28",
  "entity_type": "template",
  "created": "2022-03-06T18:12:56.283105Z",
  "updated": "2022-03-06T18:12:56.283105Z",
  "callback": {
    "url": "http://apicallbacks.pdffiller.com/handle?hash=a75cb8d8"
  }
}
6. Get the list of documents in the Flow
As soon as a new Flow is completed, retrieve the list of documents in the Flow. Use the GET /templates/{{template_id}}/flows/{{flow_id}}/documents endpoint.
Request example:
curl \
--request GET \
--url https://api.airslate.io/v1/organizations/{{organization_id}}/templates/{{template_id}}/flows/{{flow_id}}/documents \
--header 'Accept: application/json' \
--header 'Authorization: Bearer {{access_token}}'
Response example:
{
   "data": [
       {
          "id": "F06B1E91-2530-0000-000021F6",
          "name": "Course Application Form",
          "type": "HTML_FORM_NEW",
          "created_at": "2023-05-30T14:40:15Z",
          "updated_at": "2023-05-30T14:42:23Z"
        }
    ]
}
In the response, we get information about the completed document in the Flow. We’ll need the document ID for the next step.
7. Extract data from the completed Flows
Once you’ve got the needed document ID, use the GET /templates/{{template_id}}/flows/{{flow_id}}/documents/{{document_id}} endpoint to extract data from the Flow. After that, the organizer can use the extracted data at their discretion, for example, entering it into their local CRM or another database.
Request example:
curl \
--request GET \
--url https://api.airslate.io/v1/organizations/{{organization_id}}/templates/{{template_id}}/flows/{{flow_id}}/documents/{{document_id}} \
--header 'Accept: application/json' \
--header 'Authorization: Bearer {{access_token}}'
Response example:
{
 "id": "28400000-0000-0000-000000F6",
 "name": "doc1",
 "type": "PDF",
 "created_at": "2019-10-10T12:00:00Z",
 "updated_at": "2021-10-11T17:32:28+05:00",
 "fields": [
   {
     "id": "D3D00000-000-0000-000000A6",
     "name": "Input 1",
     "description": "Header description",
     "title": "Header title",
     "type": "heading"
   }
 ]
}